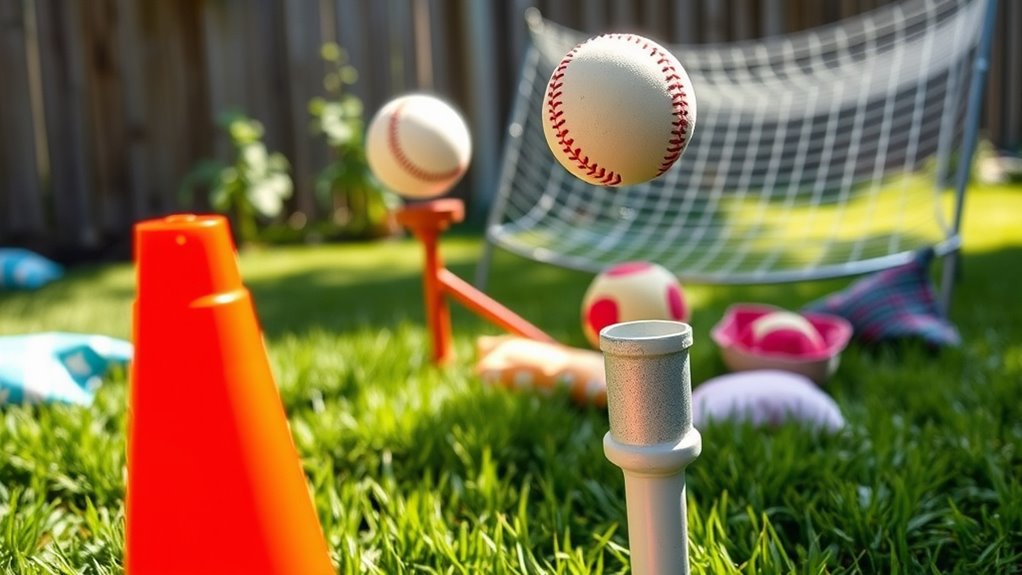

You can easily make DIY softball training aids at home using simple materials like PVC pipes for batting tees, cardboard and tape to create throwing targets, or recycled bottles filled with water for fielding trainers. You can also craft agility ladders from household items, build nets from old sheets, and set up plastic buckets for pitching practice. Keep exploring different ideas to boost your skills—more helpful tips and tricks await you.
Key Takeaways
- Create homemade batting tees and swing trainers using PVC pipes and socks for cost-effective indoor practice.
- Make DIY targets and throwing aids with cardboard, recycled bottles, and sheets to improve accuracy and reflexes.
- Build DIY agility ladders with household items to enhance footwork, speed, and coordination during training.
- Ensure safety and durability by regularly inspecting and maintaining homemade equipment like ladders and nets.
- Customize training setups to match skill levels, incorporating visualization techniques for more effective practice sessions.
Homemade Batting Tee Using PVC Pipes
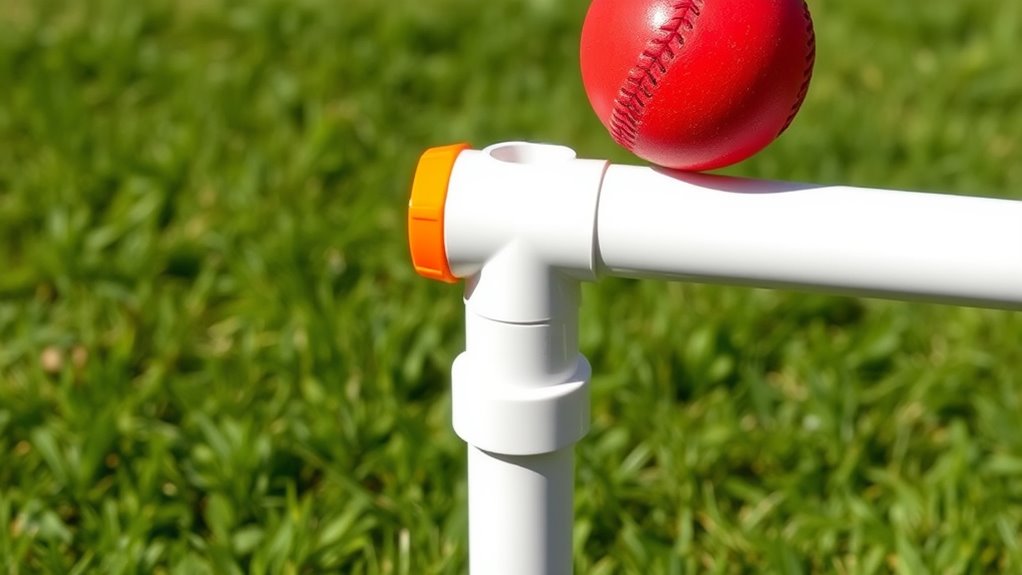
Creating a homemade batting tee with PVC pipes is a simple and cost-effective way to improve your softball hitting skills. When setting up your tee, focus on your batting stance to guarantee balance and proper posture. A stable stance allows you to execute better swing mechanics, making your hits more consistent. Adjust the height of the PVC tee so that the ball is positioned just above your front shoulder, helping you practice proper contact points. As you practice, pay attention to how your stance influences your swing path and timing. Using a homemade tee encourages repetition, helping you develop muscle memory for your ideal swing. Proper batting stance is essential for maximizing your hitting potential and building confidence at the plate. This DIY setup is perfect for refining your fundamentals and building confidence at the plate.
DIY Softball Tossing Target With Cardboard and Tape
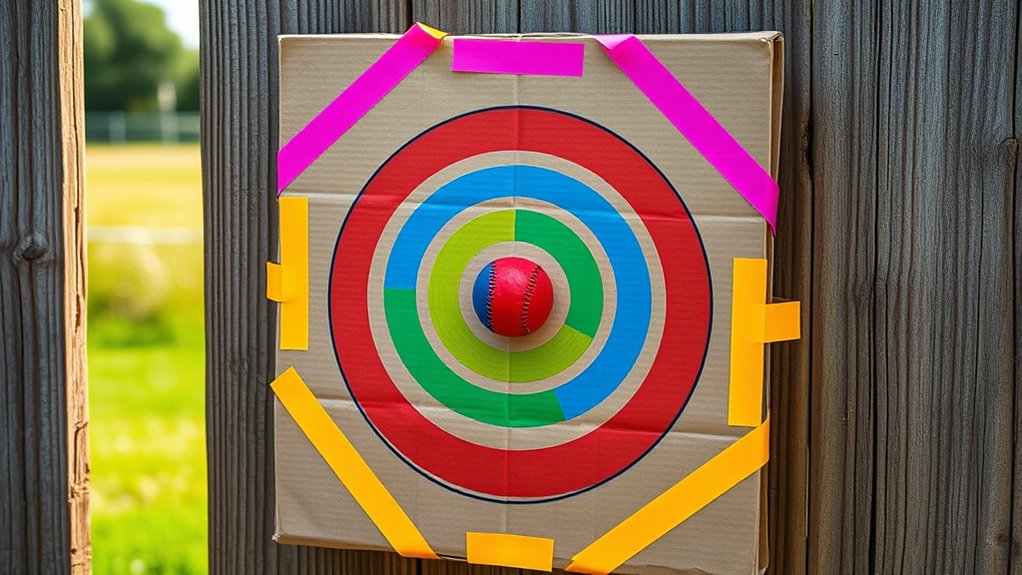
Building on your homemade batting tee, setting up a DIY softball tossing target with cardboard and tape offers a simple way to improve your target accuracy and pitch control. Start by cutting a large piece of cardboard into a circle or square, then tape it to a wall or freestanding frame at various heights. Add smaller targets within the main shape to challenge your aim. Focus on hitting specific spots to develop consistent pitch control. This setup allows you to practice precision throws, helping you better judge distances and improve your overall aim. Repeating this exercise regularly enhances your hand-eye coordination and confidence during actual gameplay. Incorporating visualization techniques into your practice can further boost your focus and effectiveness. With just cardboard and tape, you create an effective tool to refine your softball accuracy at home.
Recycled Water Bottle Fielding Trainer
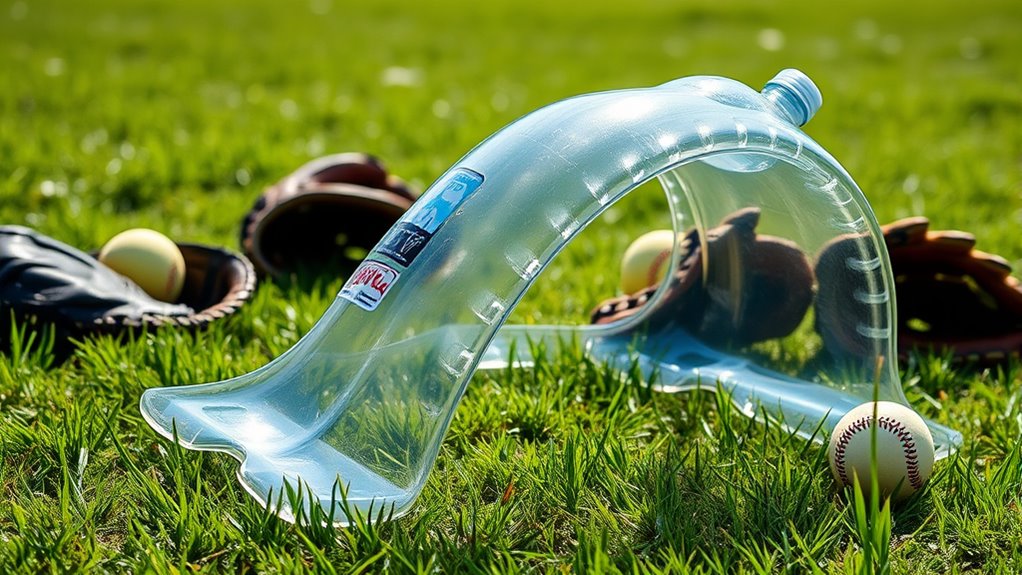
Using recycled water bottles as fielding trainers is an easy and eco-friendly way to enhance your catching skills. Not only do you improve your hand-eye coordination, but you also support recycling benefits and water conservation. Filling bottles with a small amount of water or sand creates a lightweight, portable training aid that mimics a moving target. When you toss or roll these bottles, they bounce unpredictably, helping you develop quick reflexes and better glove work. Plus, repurposing bottles reduces waste and promotes sustainability. Imagine the satisfaction of turning trash into a useful tool while contributing to environmental health. Additionally, understanding contrast ratio can help you appreciate how visual clarity affects the effectiveness of training aids in different lighting conditions. Here’s a glimpse of what this simple project can do:
| Recycling Benefits | Water Conservation | Personal Growth |
|---|---|---|
| Reduce waste | Save water resources | Build eco-conscious habits |
| Lower landfill use | Promote sustainability | Improve training skills |
| Support environmental health | Conserve water | Feel accomplished |
| Reuse materials | Protect ecosystems | Boost confidence |
| Make a difference | Lead by example | Inspire others |
Custom Sock Bat for Swing Practice
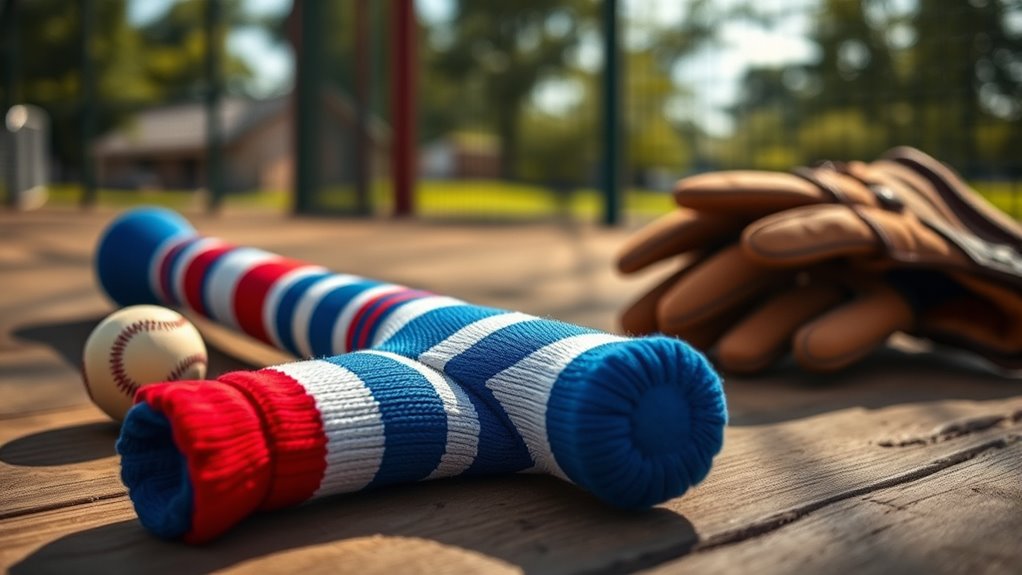
Choosing the right materials for your sock bat is key to getting good feedback during practice. Make sure your bat is sturdy yet lightweight, so you can handle it comfortably. Remember to focus on proper grip and swing technique to maximize your training benefits. Additionally, ensure your practice area is free of flammable objects to maintain a safe environment.
Material Selection Tips
Selecting the right materials for your custom sock bat is essential to guarantee it’s durable yet lightweight enough for effective swing practice. Focus on material durability to assure your bat withstands repeated use, and consider eco-friendly options to reduce environmental impact. When choosing materials, think about weight, strength, and sustainability.
- Use natural fibers like cotton or bamboo for a lightweight, eco-friendly build
- Avoid plastics that may crack or break easily
- Opt for reinforced stitching to enhance durability
- Select breathable fabrics to prevent overheating during practice
- Consider recycled materials to combine eco-friendliness with strength
Proper Bat Handling
To maximize the effectiveness of your swing practice, it’s important to handle your custom sock bat with proper technique. Focus on maintaining a firm yet relaxed bat grip; gripping too tightly can hinder your swing mechanics. Keep your hands close together on the handle, allowing for quick, controlled movements. When swinging, emphasize smooth, consistent motions rather than brute force, which helps develop proper swing mechanics. Pay attention to your stance and follow-through, ensuring your body stays aligned and balanced. Avoid common mistakes like over-swinging or jerking the bat, as these can become bad habits. Practicing with the right grip and controlled movements will improve your coordination, timing, and overall swing consistency. Consistent, mindful handling accelerates progress and builds confidence at the plate. Additionally, creating a digital-friendly environment at home can help young athletes develop tech skills that support their training routines.
Foam Ball for Safe Indoor Hitting Drills
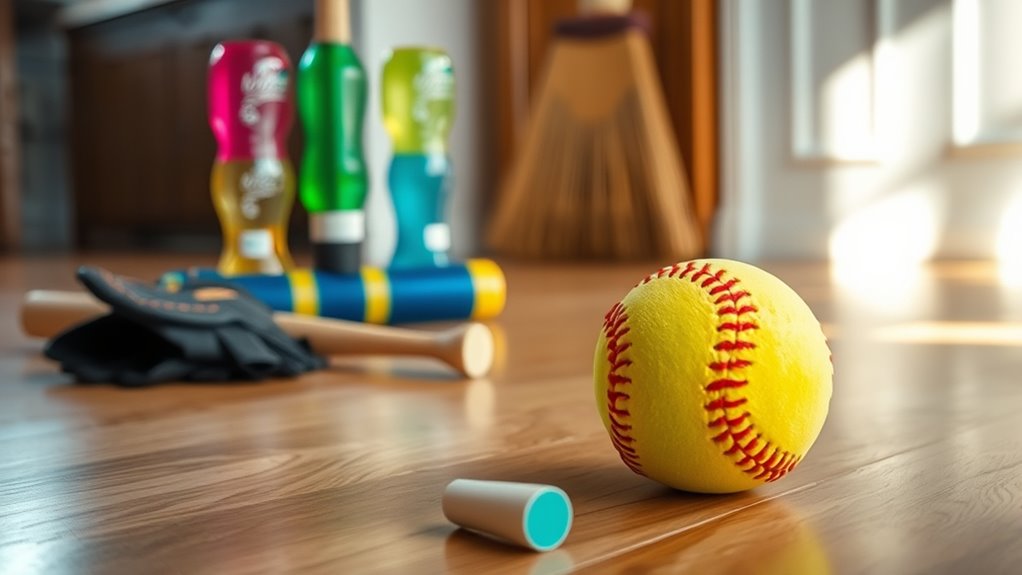
When practicing hitting drills indoors, safety is a top priority, and a foam ball can make a significant difference. It allows you to refine your batting stance and swing mechanics without the risk of damage or injury. Using a foam ball helps you focus on proper form while minimizing the chance of breaking windows or hitting others. To maximize your practice, consider these tips:
- Maintain a consistent batting stance to develop muscle memory
- Focus on smooth, controlled swing mechanics
- Use slow, deliberate swings to improve accuracy
- Track your bat path to ensure proper follow-through
- Adjust your distance from the ball for ideal contact
- Being mindful of safe practice environments ensures a productive and injury-free training session.
A foam ball encourages safe, effective practice, helping you build confidence and refine your technique indoors without worry.
DIY Agility Ladder With Household Items
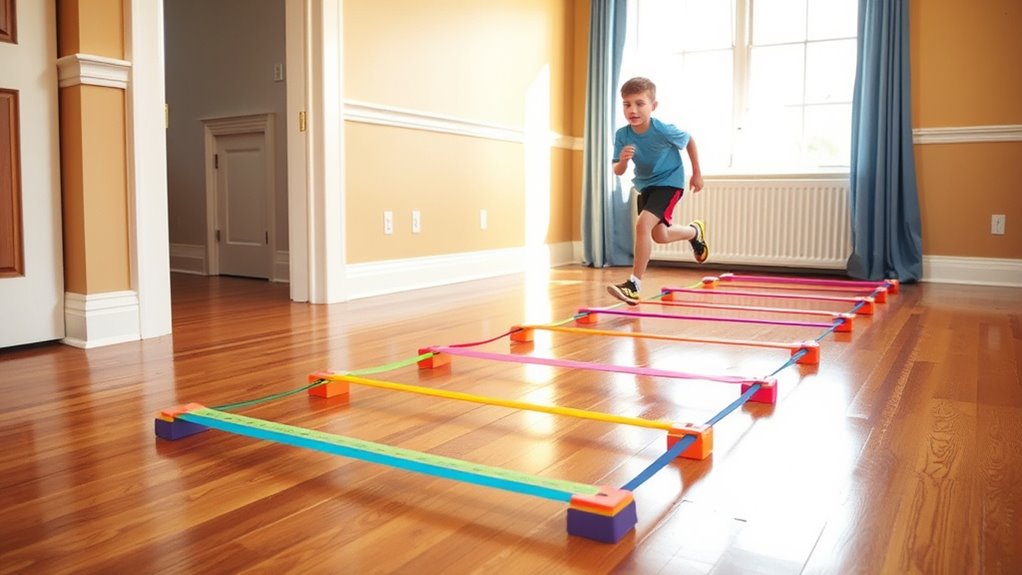
Start by choosing common household items like tape, sticks, or rope to build your agility ladder. Next, plan your layout carefully to guarantee consistent spacing and stability. Finally, consider safety and regular maintenance to keep your DIY ladder secure and effective for training. Using appropriate materials can also help ensure the ladder’s durability and safety during use.
Selecting Household Items
Are household items really suitable for creating an effective agility ladder? Yes, with some considerations. When selecting items, focus on durability and weather resistance to guarantee safety and longevity. Use sturdy materials that won’t crack or bend easily. Keep in mind the importance of ball durability if you plan to incorporate balls into your drills. Weather resistance is vital if you train outdoors, as materials should withstand rain or sun exposure. Consider these options:
- Duct tape or painter’s tape for secure, visible lines
- Rigid sticks or broom handles for the rungs
- Old jump ropes or shoelaces for side supports
- Weather-resistant tape for reinforcement
- Durable plastic or rubber mats for the base
- Ensuring the dog breeds involved in training have the right temperament and physical attributes can enhance the effectiveness of your drills.
Choosing the right household items guarantees your DIY agility ladder remains effective, safe, and weatherproof for consistent use.
Designing Ladder Layouts
Once you’ve gathered sturdy household items, designing an effective ladder layout becomes your next step. Use tape, chalk, or string to create evenly spaced rungs on the ground, forming a clear and consistent speed ladder. Focus on maintaining uniform spacing to ensure your footwork drills are effective, helping improve agility and coordination. Place the ladder on a flat surface, avoiding uneven areas that could cause tripping. Keep the rungs close enough to challenge quick foot movements but not so tight that they restrict stride. You can customize the length and spacing based on your training goals. A well-planned ladder layout enhances your agility training, making drills more effective and preparing you better for game situations. Proper setup ensures safety and maximizes training benefits.
Safety and Maintenance
To guarantee your DIY agility ladder remains safe and effective, regularly inspect all household items you’ve used for signs of wear or damage. This helps prevent accidents during practice and assures durability. Follow a maintenance checklist to keep your ladder in top shape, including checking for frayed ropes, cracked or loose connectors, and worn-out tape. Proper storage safety is also crucial; store the ladder in a dry, cool place away from sharp objects or heavy weights that could cause damage. Additionally, confirm the steps are securely attached and replace any compromised parts immediately. When maintaining your ladder, look out for:
- Frayed or worn ropes
- Loose or damaged connectors
- Cracked or peeling tape
- Deformed or broken steps
- Exposure to moisture or direct sunlight
Regular maintenance also helps preserve the structural integrity of your agility ladder, ensuring it remains safe for ongoing use.
Handmade Throwing Net Using Old Sheets or Curtains
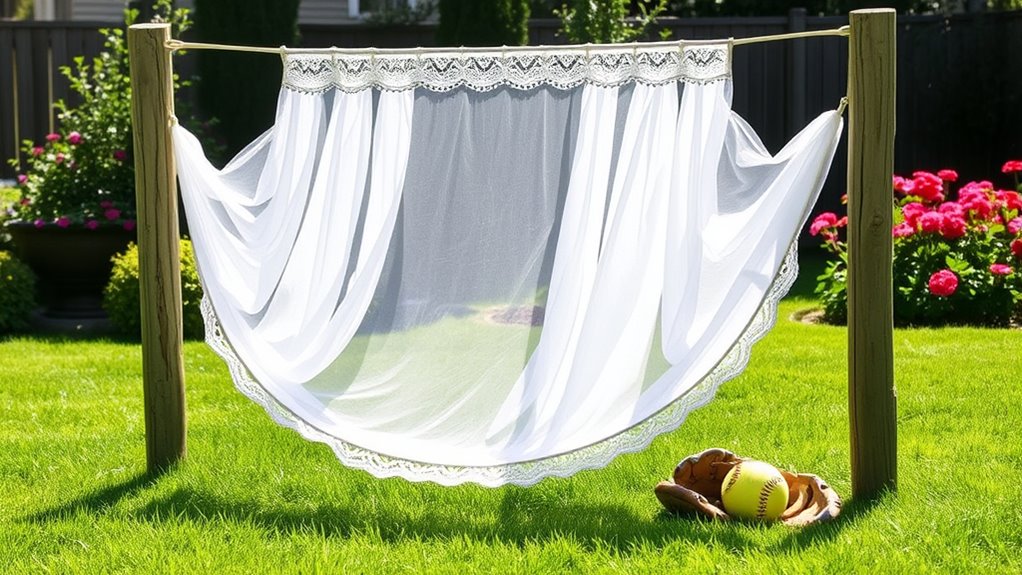
Creating a handmade throwing net from old sheets or curtains is a practical and budget-friendly way to improve your softball training. It helps you focus on field placement and grip techniques, essential for accurate throws. To build it, hang the sheets or curtains securely between two sturdy points, forming a target zone. Adjust the height to match typical throw distances. Use the table below to visualize your setup:
| Field Placement | Grip Techniques | Target Accuracy |
|---|---|---|
| Hang at chest height | Practice different grips | Aim for the center |
| Ensure tight knots | Focus on release points | Consistent throws |
| Use sturdy support | Maintain proper grip | Improve precision |
This net creates a reliable target, encouraging better control and accuracy during practice.
Portable Pitching Target Made From Plastic Buckets
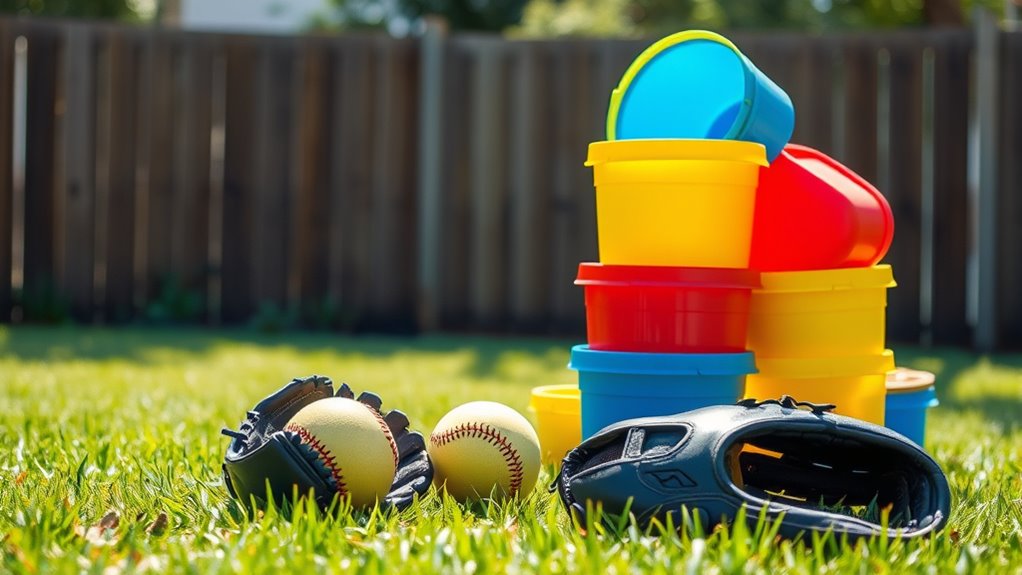
A portable pitching target made from plastic buckets offers an affordable and easy-to-assemble solution for improving your pitching accuracy. By setting up these buckets in your backyard or driveway, you can simulate game-like scenarios and focus on refining your pitching mechanics. When practicing, pay attention to your batting stance and how it influences your delivery. Adjust the buckets’ placement to create different target zones, helping you develop better control and consistency. To enhance the training, consider adding a visual marker or tape to the buckets for clear aiming points. This simple setup encourages repetition and muscle memory, making your practice sessions more effective. Overall, this DIY target helps you build precision and confidence, whether you’re working on your pitch accuracy or fine-tuning your batting stance.
Frequently Asked Questions
What Safety Precautions Should I Take When Building DIY Softball Training Aids?
When constructing DIY softball training aids, you should prioritize workspace safety by keeping the area tidy and free of hazards. Always wear protective gear like gloves and eye protection to prevent injuries from tools or materials. Use proper tools and follow instructions carefully. Keep children or pets away from the workspace, and ensure good lighting. Taking these precautions helps prevent accidents and keeps your building process safe and enjoyable.
How Can I Customize Homemade Training Tools for Different Skill Levels?
Imagine your training as tuning a radio to just the right station. To customize your homemade tools for different skill levels, you adjust the training difficulty. For beginners, use softer balls or lighter bats; for advanced players, add resistance or increase target precision. Skill level adjustments help you progress smoothly, ensuring each practice session challenges you without overwhelming, creating a tailored experience that grows with your abilities.
Are There Affordable Materials Recommended for Making Durable Practice Equipment?
You can use cost-effective materials like PVC pipes, sturdy tape, and old tennis balls for durable supplies. These items are affordable, readily available, and strong enough to withstand regular practice. Recycled items, such as plastic bottles or foam, also work well and save money. By choosing these durable supplies, you guarantee your homemade training tools last longer, making your practice sessions more effective without breaking the bank.
How Do I Maintain and Clean Homemade Softball Training Aids?
Think of your training aids as loyal teammates that need care. To maintain their strength, follow simple cleaning procedures like wiping down with a damp cloth after each use. Use mild soap for stubborn dirt on durable materials, ensuring material longevity. Regular inspection helps spot wear early. By nurturing your homemade tools, you keep them reliable and ready, turning practice into a smooth, ongoing game of progress.
Can These DIY Tools Be Used Effectively for Team Practice Sessions?
You can definitely use these DIY tools effectively for team practice sessions. They promote team cohesion by encouraging everyone to participate and work together. Plus, they help with skill development, allowing players to practice specific techniques in a focused way. Just guarantee all tools are safe and suitable for group use, and you’ll see improvement in teamwork and individual skills. These tools make practice sessions more engaging and productive.
Conclusion
With these DIY softball training aids, you can sharpen your skills anytime, anywhere—no need for a time machine to find the perfect practice setup. Whether you’re crafting a homemade batting tee or a recycled water bottle trainer, each tool helps you improve without breaking the bank. Remember, even in the chaos of your busy schedule, a little ingenuity can turn your backyard into a legendary training ground, just like the greats of yesteryear.